Why Cleaning and Surface Preparation Matter Before Painting
When people think about painting, the part they usually picture is the roller going onto the wall.
But one of the most important stages happens before any paint is applied.
Cleaning and preparing the surface can make the difference between a finish that looks smooth and well done and one that begins showing problems much sooner than expected.
Paint works best when it is applied to a clean, dry and sound surface.
Paint Needs Something Solid to Stick To
Paint does not simply cover whatever is underneath it.
It needs to bond properly with the surface.
Dust, grease, loose paint and other contaminants can get between the new coating and the wall.
If the surface underneath is unstable, adding another coat over the top does not make it stable again.
This is why preparation is so important.
Dirt Is More Common Than It Looks
Walls and exterior surfaces often look clean from a distance.
Up close, they may have a layer of dust, fingerprints, cooking residue, cobwebs or grime.
Exterior walls can also collect pollution, soil and organic material.
If these contaminants are left in place, they may interfere with the paint.
A clean surface gives the new coating a much better base.
Kitchens Need Extra Attention
Kitchen walls can collect grease and cooking residue even when they do not look obviously dirty.
Areas near cooktops, benches and light switches are particularly prone to build-up.
Painting straight over grease can cause adhesion problems.
Cleaning these surfaces thoroughly before painting is an important part of preparation.
Bathrooms and Damp Areas Need Checking
Bathrooms, laundries and other damp spaces may develop mould, mildew or moisture-related problems.
Painting over mould without dealing with the cause is unlikely to solve the issue.
The surface needs to be cleaned and allowed to dry properly.
Ventilation or moisture problems may also need attention before repainting.
Exterior Surfaces Collect More Than Dust
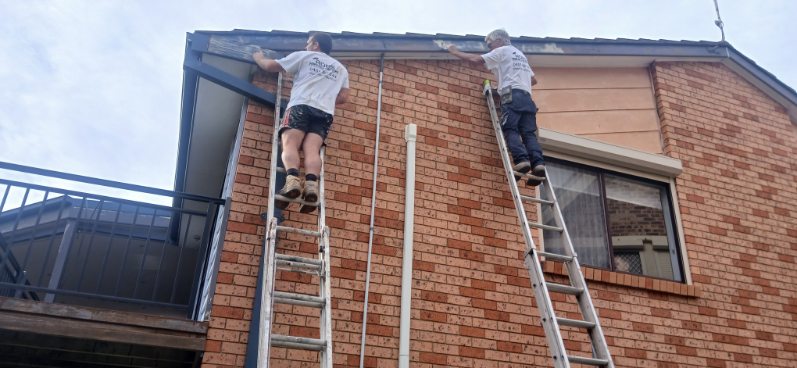
Outside, painted surfaces have to deal with weather, dirt, cobwebs, insects, mould and pollution.
Before repainting, these need to be removed.
Cleaning also gives you a better view of the condition of the existing paint.
Once the grime is gone, peeling, cracks or damaged areas may become easier to see.
Loose Paint Must Be Removed
If the existing coating is peeling or flaking, it is not a sound base for new paint.
Loose material should be removed before repainting.
The edges may also need sanding so the transition between existing paint and the exposed surface is smoother.
Painting directly over loose material usually means the new paint is attached to something that is already failing.
Fill Holes and Repair Damage
Small holes, dents and cracks may not seem important before painting, but fresh paint can make them more noticeable.
Repairing these areas first helps create a smoother finished wall.
Allow filler to dry properly and sand it flush with the surrounding surface.
After sanding, remove the dust before applying paint.
Sanding Helps Create a Better Surface
Sanding serves several purposes.
It can smooth repairs, remove rough areas and help prepare glossy surfaces for repainting.
Not every wall needs heavy sanding.
Often the goal is simply to smooth imperfections and create a suitable surface for the next coating.
Any dust created by sanding needs to be cleaned away before painting.
Surfaces Must Be Dry
Cleaning is important, but so is drying.
Paint should not be applied over a wet or damp surface.
This is particularly important outdoors, where walls may still hold moisture after rain even if the weather has cleared.
Bathrooms, laundries and areas affected by leaks should also be properly dry before repainting.
Primer May Be Part of the Preparation
Some surfaces require primer after cleaning and repairs are complete.
Bare timber, new plaster, repaired sections and stained areas are common examples.
Primer helps prepare these surfaces for the finishing coats.
It works best when the surface underneath has already been cleaned and repaired properly.
Do a Final Check Before Opening the Paint
Once cleaning, filling and sanding are complete, take one final look at the surface in good light.
Run your hand over repaired sections, check corners for dust and look across the wall from an angle. Side lighting can make raised filler, dents and rough patches much easier to see.
This is the ideal time to correct small imperfections. Once the finish coats are on, those same problems can become more noticeable and harder to fix neatly.
Preparation Makes Painting Easier
A properly prepared surface is usually easier to paint.
The roller moves more smoothly, repairs are less visible and the finished coating tends to look more even.
It also reduces the amount of time spent trying to fix problems after the final coat has gone on.
Preparation may feel like the slow part of the job, but it often saves time overall.
Do Not Rush the First Step
It can be tempting to skip cleaning and repairs when you are excited to change the colour of a room.
But paint cannot hide every problem.
Dust, grease, cracks and loose coatings are still there underneath.
Taking the time to prepare the surface properly gives the paint the best chance of looking good and lasting well.
Good Paintwork Starts Before the Paint
Professional-looking results are rarely about one special brush or roller technique.
They usually come from doing the basics well.
Cleaning, repairing, sanding and priming where required create the foundation for everything that follows.
The finishing coat may be the part everyone sees, but the preparation underneath is what helps make that finish possible.
